DIY Disney Halloween Nails: Easy Tutorials for Festive Fun
Introduction
Halloween is a time for creativity, fun costumes, and festive decorations! One creative way to celebrate the holiday is through your nails. DIY Disney Halloween nails offer a playful and colorful way to express your love for your favorite characters while getting into the Halloween spirit. In this article, we will explore various easy tutorials that anyone can follow, allowing you to transform your nails into adorable works of art. From Disney princess designs to spooky Disney villains, there’s something for everyone to enjoy. Let’s delve into the exciting world of Disney Halloween nails!
Why Choose Disney Halloween Nails?
Disney characters have a magical way of capturing our hearts. Decorating your nails with Disney themes is not only fun but also allows you to showcase your creativity.
Celebrate Your Favorites
- Nostalgic Connections: Growing up with Disney movies creates sentimental value. Many people have fond memories associated with these characters, making Halloween a perfect time to celebrate that nostalgia.
- Variety of Characters: From mousy Mickey to regal Cinderella, there are endless options for designs. This variety lets you pick and choose your favorite characters for your Halloween nails.
Unique Designs to Explore
- Playful Themes: Disney offers playful aesthetics suitable for Halloween. You can opt for cute designs or go for spooky interpretations of beloved characters.
- Personalization: One of the best parts of DIY nail art is personalization. You can add your unique flair to create a look that reflects your personality.
Gathering Your Materials
Before diving into the tutorials, it’s essential to gather all the necessary materials for your DIY Disney Halloween nails.
Essential Nail Supplies
Polish
- Variety of Colors: It’s essential to have a selection of nail colors for your DIY Disney Halloween nails. This includes base colors, which will serve as the foundation for your designs.
- Base Colors: Choose a few versatile base colors that will complement the Disney themes you plan to create. For example, classic colors like white, black, red, and blue can cover a range of Disney characters and designs.
- Top Coats: A quality top coat is crucial for protecting your designs and providing a glossy finish. Look for quick-drying formulas that seal in your artwork and help prevent chips and scratches.
- Character-Specific Shades: Incorporate shades that reflect your favorite Disney characters. For instance, if you’re designing nails based on Elsa from Frozen, consider using frosty blue and sparkly white polishes. Similarly, vibrant red and yellow shades work well for Mickey Mouse.
- Special Effects Polishes: Consider adding fun textures or effects to your collection—like glitter, matte, or metallic finishes. These can add depth and dimension to your nail designs.
Art Tools
- Dotting Tools: Dotting tools are essential for creating detailed designs and patterns. They come in various sizes to help you make different dot sizes, which are great for creating floral patterns, eyes for characters, or whimsical polka dots.
- Nail Brushes: Invest in a set of fine-tipped nail brushes for painting intricate designs. These brushes will allow you to create detailed artwork, such as character outlines or themed decorations.
- Nail Tape: Nail tape is a fantastic tool for creating clean lines and geometric designs. It can help you achieve precision when creating intricate patterns like stripes or diamonds, ensuring a polished look.
- Sponge Applicators: Use sponge applicators for techniques like gradient nails or ombre designs. This method can add a beautiful fading effect that complements many Disney characters and brings your nail art to life.
- Cleanup Brush: A cleanup brush is crucial for maintaining neatness during your nail art application. It allows you to clean up any excess polish around the nails, giving your final look a professional touch.
Nail Stickers and Stencils
- Ease of Use: Nail stickers and stencils are perfect for both beginners and experienced nail artists. They simplify the process of achieving complex designs without extensive painting skills.
- Disney-Themed Options: Look for Disney-themed stickers that feature popular characters, icons, or quotes. These stickers can add a fun and festive touch to your nails, allowing you to easily pay tribute to your favorite Disney stories.
- Stencils for Precision: Stencils provide an easy way to create consistent designs, such as character outlines, symbols, or themed images. They help ensure that the shape and placement of your design remain uniform across all nails.
- Temporary vs. Permanent: Nail stickers can either be temporary, which peel off easily, or more permanent, intended for long-lasting wear. Be sure to choose the type based on how long you wish to keep your designs.
- Personalization: While stickers and stencils simplify the design process, you can always personalize your designs further. Combine stickers with painted elements or use stencils to create unique patterns that express your creativity.
Preparation is Key
- Clean Your Nails: Start by prepping your nails. Ensure that they are clean, dry, and free of old nail polish. This provides a better base for your nail art.
- Base Coat: Applying a clear base coat prevents staining and extends the durability of your nail designs. It also helps the nail polish adhere better to your nails.
Easy DIY Halloween Nails Tutorials
Now that you have your materials ready, let’s explore some easy DIY tutorials to create stunning Disney Halloween nails.
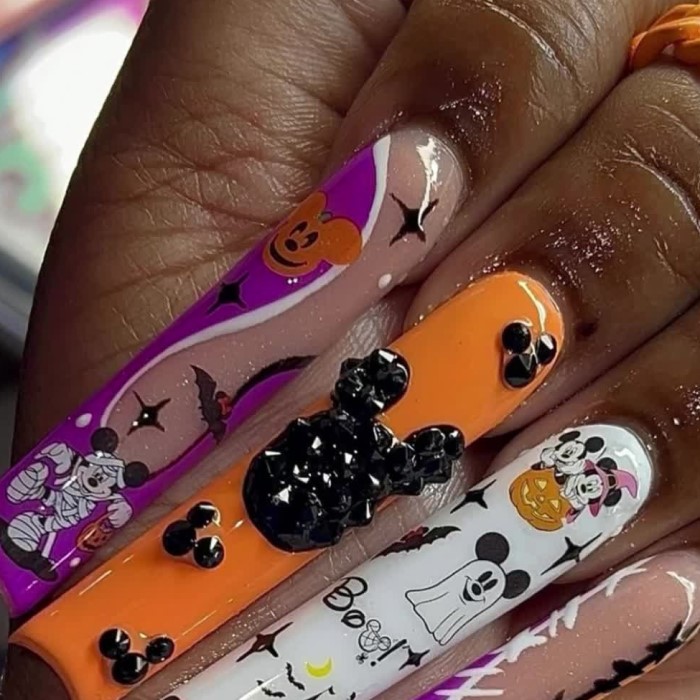
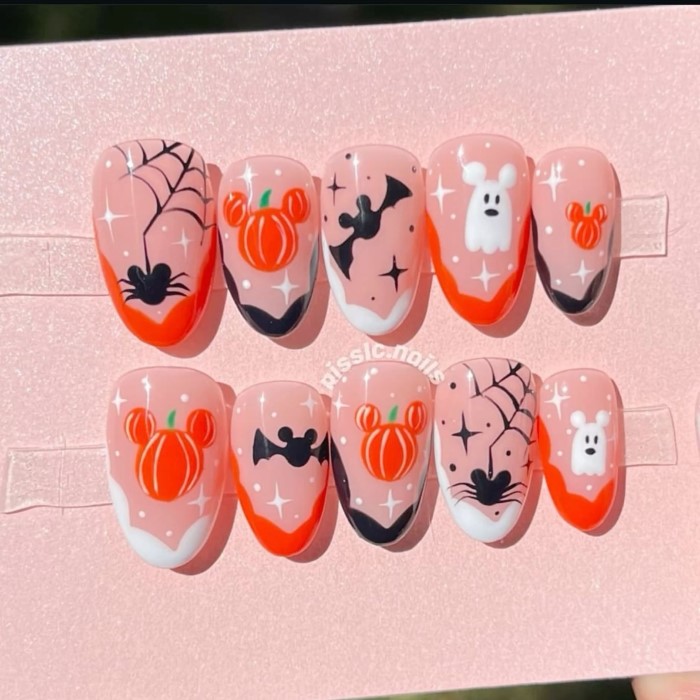
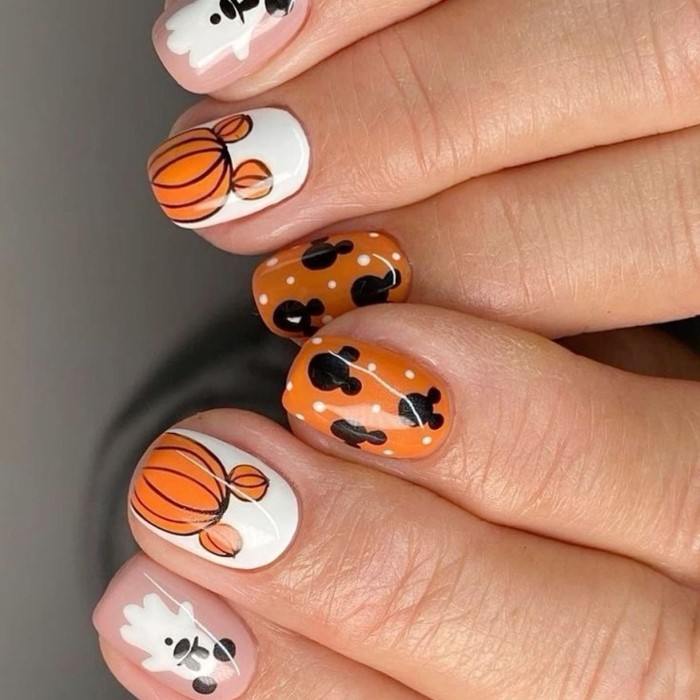
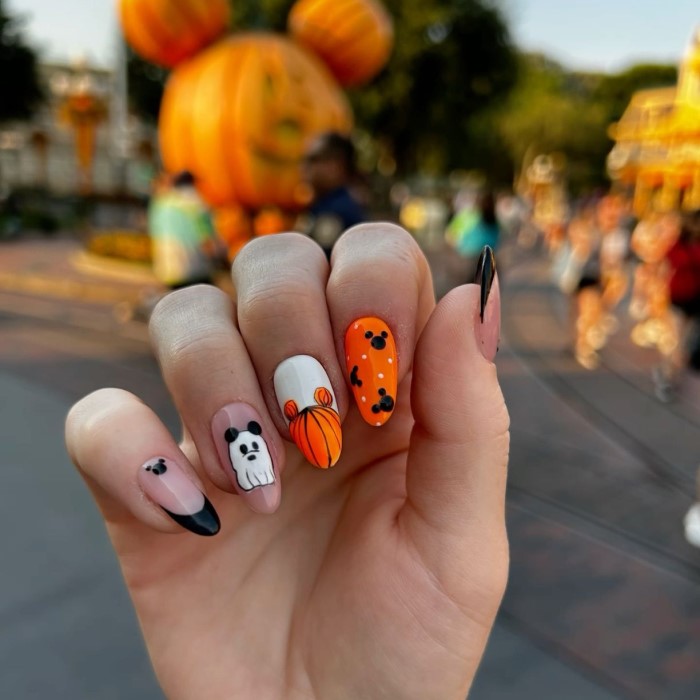
Mickey Mouse Pumpkin Nails
- Base Color: Start with an orange base coat to create a pumpkin effect.
- Mickey Mouse Faces: Use a black polish or nail art pen to draw Mickey Mouse faces. include round ears and expressive eyes.
- Top Coat Finish: Finish with a clear top coat for shine. This classic look is perfect for capturing the Halloween spirit!
Disney Villains Nail Art
- Choose Your Villain: Select a Disney villain like Maleficent or Ursula.
- Color Palette: Use colors associated with the character – green and purple for Maleficent and deep purple and blue for Ursula.
- Character Designs: Paint iconic symbols or elements representing that villain, such as Maleficent’s horns or Ursula’s seashell.
- Tip: Always allow the layers to dry before applying another to avoid smudging.
Princess-Themed Variations
- Pick Your Princess: Choose a favorite Disney princess as your inspiration. Snow White and Cinderella are popular choices.
- Color Choices: Use bright colors. For Snow White, use red, blue, and yellow; for Cinderella, opt for blues and silvers.
- Embellishments: Enjoy adding little details like bows, crowns, or glass slippers using a fine brush.
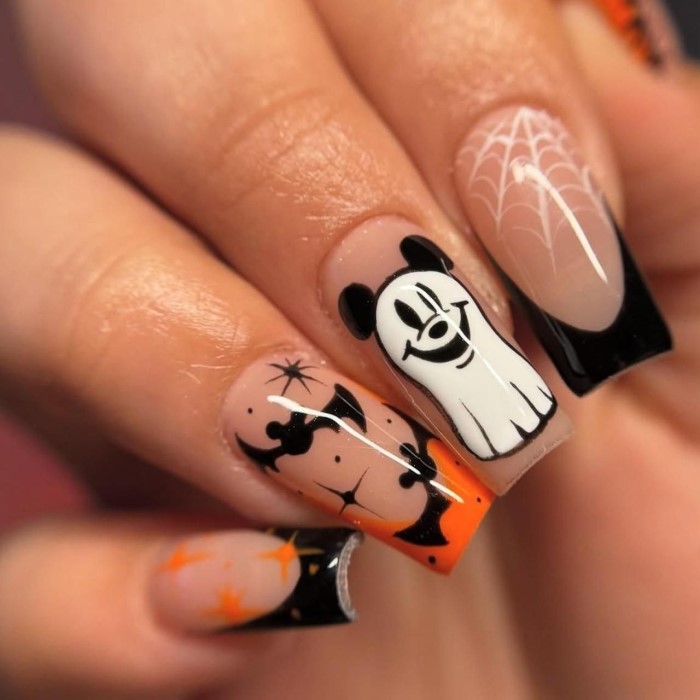
Tutorial 4: Ghostly Mickey and Friends
- White Base: Paint all your nails with a white base coat. This will serve as a canvas for ghostly creations.
- Ghost Faces: Use black polish to draw ghost faces resembling Mickey, Donald, or Goofy.
- Finishing Touch: Adding a few glittery touches will give it a festive look.
Simple Nail Stickers
- Easy Application: For a quick design, use pre-made Disney Halloween nail stickers.
- Positioning: Apply the stickers on your painted nails.
- Top Coat Seal: Add a top coat to seal the stickers and enhance durability.
Tips for Successful DIY Nail Art
To achieve the best results for your Disney Halloween nails, here are some helpful tips.
Practice Patience
- Drying Time: Allow each layer of nail polish to dry completely before applying additional layers or designs. Rushing the process may lead to smudges.
- Trial Runs: If unsure about a particular design, practice on a piece of paper or a fake nail first.
Keep Tools Clean
- Tool Maintenance: Clean your brushes and tools after use. This ensures they remain functional for future nail art applications.
- Avoid Cross-Contamination: When using multiple colors, clean your brushes thoroughly between uses to avoid mixing colors improperly.
Maintaining Your DIY Disney Halloween Nails
After putting in the effort to create stunning nail art, it’s essential to maintain your designs.
Regular Touch-ups
- Monitor Wear: Keep an eye on chips or scratches. If necessary, touch-up areas that may need extra color.
- Reapply Top Coat: To maintain shine and protect the artwork, consider reapplying a top coat every few days.
Care After the Celebration
- Removing Polish Safely: Once Halloween is over, use a gentle nail polish remover to take off the designs. This helps preserve your nails.
- Hydrate Your Nails: Apply cuticle oil after removing nail polish to keep your nails and surrounding skin healthy.
Frequently Asked Questions
What are the comfiest shoes for being on your feet all day?
The comfiest shoes for extended periods are those with ample cushioning, support, and breathable materials. Look for shoes marketed as suitable for long standing or walking.
What is the most comfy shoe brand?
Popular comfy shoe brands include Skechers, Clarks, and New Balance, known for their comfortable designs and supportive features.
How can I stop my feet hurting in safety shoes?
Consider selecting safety shoes that fit properly, provide adequate cushioning, and have supportive insoles. Regular breaks and stretching can also help alleviate discomfort.
What shoes are good for standing 12 hours?
Shoes with great arch support, cushioning, and slip resistance are ideal for standing long hours. Brands that cater to work settings typically offer suitable options.
Conclusion
Creating your own Disney Halloween nails can be a delightful part of the Halloween festivities. With easy tutorials and fun designs, you can express your creativity while celebrating your favorite Disney characters. Whether you replicate our suggested designs or come up with your own, the possibilities are endless. Don’t forget to gather all your materials, have fun experimenting, and, most importantly, enjoy the process! Happy crafting and have a spooktacular Halloween!