How to Thin Out Nail Polish: Easy Tips for Smooth Application
Introduction
If you’ve ever attempted to paint your nails and found that your nail polish was too thick and clumpy, you’re not alone. Many people struggle with achieving a smooth application due to the consistency of their nail polish. Learning how to thin out nail polish can be a game-changer, leading to a beautiful and professional-looking manicure at home. In this article, we will explore effective methods to thin out nail polish, the best products to use, and tips to maintain your nail care routine.
Why Nail Polish Thickens Over Time
Nail polish can thicken due to several reasons. One common cause is exposure to air. When nail polish bottles are left open for too long, air enters and changes the consistency. The evaporation of solvents in the polish makes it thicker and harder to apply.
Another reason is temperature changes. Extreme heat or cold can alter the polish’s composition. Storing nail polish in places with unstable temperatures, like near sunlight or in a car, can accelerate thickening.
Old nail polish is another factor. Over time, the ingredients in the polish can separate, making it less fluid. If not shaken often, the pigment and solvents do not mix well, contributing to clumping and thickness.
Improper bottle storage can also lead to thickening. When the bottle is not tightly sealed, air and moisture can get inside. This speeds up the drying process inside the bottle.
Lastly, frequent usage of nail polish can dry out the brush, which might introduce dryness into the bottle. This makes the polish thicker over time.
Understanding why nail polish thickens will help you avoid common mistakes. With proper storage and handling, you can prolong the life and quality of your nail polish.
Signs Your Nail Polish Needs Thinning
It’s essential to recognize when your nail polish needs thinning. This helps maintain its quality and application. Here are some signs that your nail polish may require thinning:
- Thick Consistency: If your polish feels sticky, clumpy, or difficult to spread, it’s too thick. A smooth application becomes challenging when the polish’s texture changes.
- Bubble Formation: Bubbles can form if the polish is too thick. These bubbles ruin a flawless manicure.
- Uneven Application: Streaky or uneven coats are another warning sign. This occurs when polish dries unevenly due to its thick state.
- Delays in Drying: If your nail polish takes much longer to dry, it might need thinning.
- Separation of Ingredients: If you notice layers forming inside the bottle, the polish components are separating. This usually indicates the need for thinning.
Pay attention to these signs early. Understanding how to thin out nail polish will save your product and improve its application. Properly maintained nail polish ensures a great manicure every time.
Common Mistakes to Avoid When Thinning Nail Polish
Thinning nail polish can restore its usability. However, common mistakes can ruin your polish permanently. Here are some things to avoid:
- Adding Too Much Nail Polish Thinner: Using excess thinner can ruin the formula. Always add small amounts and test.
- Using Water: Water does not mix with nail polish and can damage its consistency completely.
- Overusing Acetone or Nail Polish Remover: These substances can break down the polish’s formula, leaving it unusable.
- Mixing the Bottle Too Vigorously: Shaking the bottle forcefully creates bubbles. Instead, roll the bottle gently.
- Using Heat: Heating the bottle to thin the polish can make it clump and degrade.
- Ignoring Expiration: Old polish may not thin properly. Check the expiry date before attempting.
- Failing to Seal the Bottle Properly: Unsealed bottles can let air in, worsening the thickening issue further.
- Not Checking Compatibility: Some ingredients don’t mix well. Always confirm before adding to your polish.
Avoiding these mistakes will keep your nail polish usable and effective. Proper care ensures a smooth and even application.
DIY Methods to Thin Nail Polish
To revive thick and clumpy nail polish, DIY methods can be very effective. Using the right thinning techniques helps restore your polish and ensures smooth application.
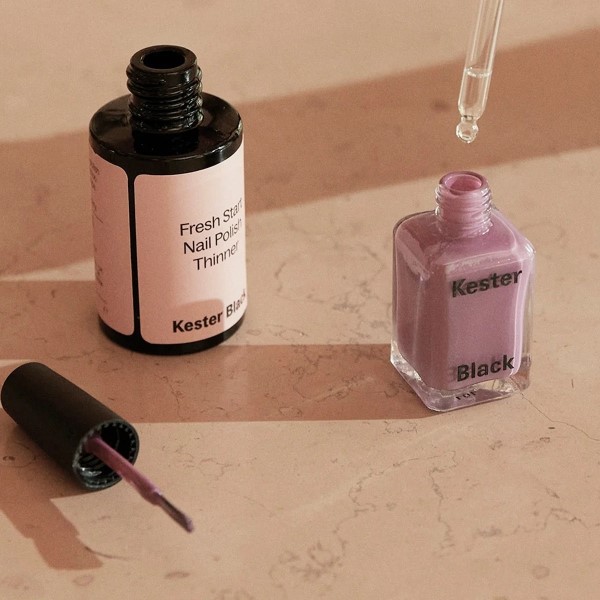
How to Use Nail Polish Thinner
Nail polish thinner is one of the best solutions to fix thickened polish. Here’s how to use it:
- Choose a quality nail polish thinner: Ensure it is designed specifically for nail polish.
- Start with small amounts: Add 2-3 drops of nail polish thinner to your bottle.
- Mix instead of shaking: Roll the bottle gently between your palms to mix the thinner and polish.
- Test the polish: Apply a small amount to check the consistency.
- Repeat if necessary: If the polish is still thick, add more thinner gradually.
Always be cautious not to add too much thinner at once. This can dilute the formula and ruin the polish.
Using Acetone or Nail Polish Remover: Pros and Cons
Acetone or nail polish remover can also thin out nail polish effectively. Here are the pros and cons:
Pros:
- Acetone is easily available at home.
- It works quickly to break down thick polish.
- Nail polish remover is affordable and convenient.
Cons:
- Overusing acetone weakens the polish formula.
- Acetone may cause the polish to separate over time.
- Nail polish remover can alter the polish’s color and texture if used excessively.
If you want long-lasting results, acetone should be used sparingly. Nail polish thinner is ultimately a safer option for thinning polish.
DIY methods like nail polish thinner and acetone or nail polish remover can save thickened polish. Use them carefully to maintain the quality of your polish.
Step-by-Step Guide to Thinning Nail Polish Safely
Thinning nail polish is easy if done carefully. Follow these steps to ensure safe, effective results:
Examine the Polish
- Initial Assessment: Before you begin the process of thinning out your nail polish, take a close look at the bottle. Examine the polish for any signs of thickening, clumping, or separation of ingredients.
- Identifying Common Issues: Look for inconsistencies such as an oddly thick texture or visible chunks. If you notice separation, it may indicate that the polish has not been stored properly or is nearing its expiration.
- Deciding to Proceed: If the polish appears to have issues, decide whether it’s worth the effort to fix or if it’s time to consider replacing it entirely.
Gather Materials
- Essential Supplies: Before starting the thinning process, gather all necessary materials. You will need nail polish thinner, acetone, or nail polish remover, depending on what you decide to use.
- Tools for Access: In addition to the thinner or remover, ensure you have your thick nail polish bottle ready and within reach. You may also want to have a dropper or funnel for precise measurement.
- Cleanup Supplies: Keep cotton swabs handy for any potential mess and a cleaning cloth for wiping any spills.
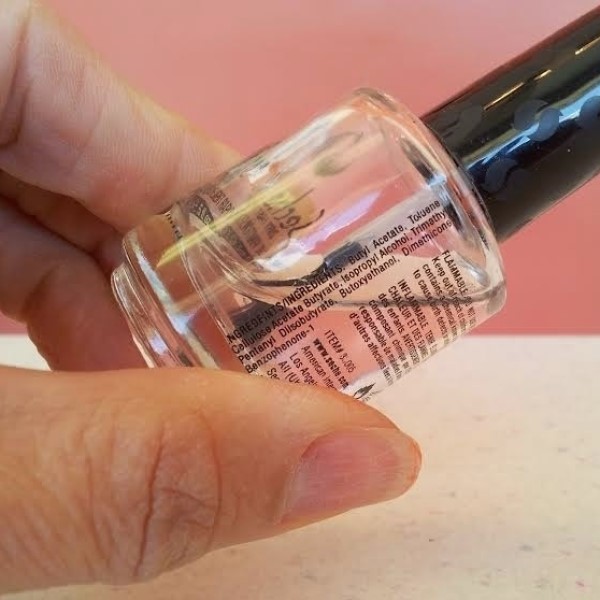
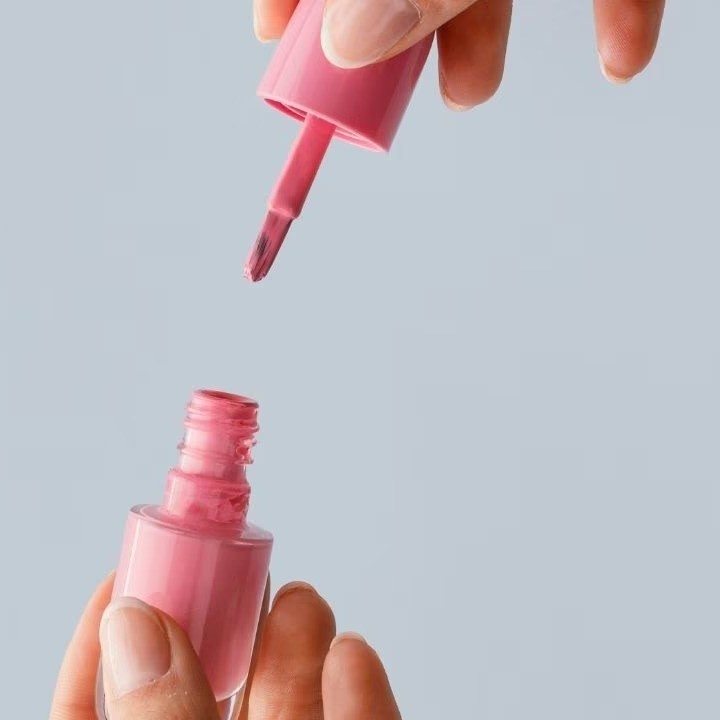
Open the Bottle
- Cap Removal: Carefully open the nail polish bottle by fully removing the cap. Ensuring that the cap is completely off allows for better access and enables you to measure and mix accurately.
- Avoiding Spills: Take caution while opening the bottle to prevent accidental spills. It’s best to do this on a flat, stable surface to minimize mishaps during the process.
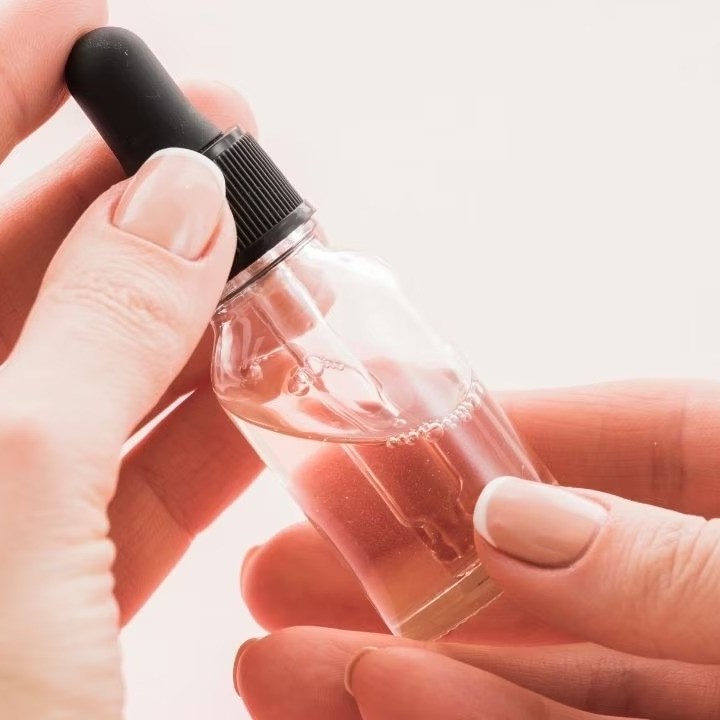
Add Thinner Sparingly
- Measure Carefully: Start by adding 2-3 drops of nail polish thinner directly into the bottle. Be conservative with your application, as less is often more in this case.
- Avoid Excessive Amounts: Using too much thinner can alter the polish’s formula negatively, leading to poor performance. Therefore, it’s important to start small and assess before adding more.
Roll the Bottle Gently
- Mixing Method: Instead of shaking the bottle, roll it gently between your palms to mix the thinner and polish. This method prevents the formation of air bubbles, which can affect the application.
- Ensuring Even Distribution: By rolling, you help ensure that the thinner is evenly blended into the polish, resulting in a smoother consistency suitable for application.
Test the Polish
- Sample Application: After mixing, take a moment to test the consistency. Apply a small amount of the thinned polish to a nail or an inconspicuous test surface. This step is crucial to ensure the polish flows smoothly without clumping.
- Evaluate Results: Observe how the polish applies. Check for smoothness in application and the overall finish. If it still feels thick or uneven, further adjustments may be needed.
Repeat Process If Needed
- Gradual Adjustments: If you find the polish is still too thick after testing, add more thinner gradually. Repeat the mixing process, ensuring to roll the bottle again for a proper blend.
- Patience is Key: Take your time with this process. It’s better to make small adjustments than to over-thin the polish all at once.
Securely Seal the Bottle
- Final Cap Installation: After achieving the desired consistency, ensure that you tighten the cap securely back onto the bottle. This step is important to prevent air from entering and compromising the polish.
- Check for Leaks: Before storing, double-check that the cap is on tight to minimize the risk of leaks or spills.
Store Properly
- Optimal Conditions: Find a suitable place to store the polished bottle. Ideally, keep it in a cool, dark space away from direct sunlight and extreme temperatures.
- Protecting Quality: Proper storage will help maintain the polish’s quality over time, ensuring that it remains usable for longer periods.
Dispose of Expired Polish
- Recognizing Expiration: If, after trying to thin it out, you determine that the nail polish is too old or remains unusable, it’s time to consider disposal.
- Responsible Disposal: Dispose of expired or unusable nail polish responsibly. Many local communities have guidelines for hazardous waste disposal, so check for options in your area to ensure it is discarded safely.
Follow these straightforward steps to safely revive your nail polish and ensure smooth application. Handling polish with care keeps it in usable condition for longer.
Best Products for Thinning Nail Polish
Restoring thickened nail polish can be quick with the right products. Here are the top choices:
- Nail Polish Thinners: These are specially designed to thin nail polish without altering its formula. Look for reputable brands known for maintaining the polish’s texture and consistency.
- Acetone-based Solutions: Acetone can effectively break down thick nail polish. Choose mild acetone solutions to prevent damage to the polish.
- Universal Style Thinners: Some companies offer universal nail polish thinners compatible with various brands. These are convenient and versatile.
- Silicon-free Solutions: Avoid thinners with silicone, as they can affect the polish’s texture. Check the product label carefully.
- Professional Nail Polish Thinner Kits: These kits usually come with measuring tools and instructions, ensuring precise application and better results.
Tips for Selecting the Best Products
- Compatibility: Ensure the product matches your nail polish brand.
- Ease of Use: Pick products with clear instructions for hassle-free thinning.
- Price: Seek affordable options but prioritize quality.
Using the right products ensures your nail polish is thinned safely without compromising its quality. Knowing how to thin out nail polish effectively maintains your favorite shades for longer.
How to Prevent Nail Polish from Thickening in the Future
Prevent nail polish from thickening by following these practical tips:
Seal the Bottle Tightly
- Importance of a Secure Closure: Always ensure that the cap of your nail polish bottle is closed tightly after each use. A secure seal is crucial because it prevents air from entering the bottle, which can cause the polish to thicken or dry out.
- Check for Proper Closure: Make it a habit to check if the cap is fastened properly before putting the polish away. This simple action can greatly extend the life of your nail products.
Store in a Cool, Dry Place
- Optimal Storage Conditions: It’s essential to keep your nail polish in a cool and dry environment. Extreme temperatures can alter the viscosity and chemical composition of the polish.
- Avoid Direct Sunlight: Protect your polishes from direct sunlight, as UV rays can degrade the formula over time. Instead, choose a shaded area, such as a drawer or cabinet, for storage.
- Avoid Temperature Fluctuations: Maintaining a consistent temperature is key. Rapid changes in temperature, such as moving from heat to cold, can negatively affect the polish’s performance.
Avoid Storing in the Bathroom
- Humidity Concerns: Bathrooms are typically damp environments, which can lead to high humidity levels. Humidity can cause nail polish to become lumpy or alter its consistency, making it difficult to apply smoothly.
- Better Storage Alternatives: Instead of keeping your nail polish in the bathroom, consider storing it in a bedroom drawer or any other room with lower humidity levels. This will help maintain the polish’s quality.
Clean the Bottle’s Neck
- Routine Maintenance: Regularly wipe the neck of the nail polish bottle with a clean cloth or tissue. This action removes any excess polish that may have spilled or dripped during use.
- Preventing Clogs: Cleaning the neck helps prevent clogs or difficulties in sealing the bottle effectively. A clean neck ensures that the lid can be secured snugly without interference.
Shake Regularly
- Mix Ingredients Well: To keep your nail polish in optimal condition, gently shake or roll the bottle every few weeks. This mixing helps to incorporate any settled ingredients, ensuring even distribution throughout the polish.
- Avoid Aggressive Shaking: While regular shaking is beneficial, avoid vigorous shaking. This can create air bubbles within the polish, which can adversely affect its application.
Use the Right Application Technique
- Minimize Exposure During Application: When using nail polish, try not to leave the cap off for long periods. Prolonged exposure to air can cause the polish to thicken and dry out prematurely.
- Plan Your Application: Decide your nail painting plan before you start, so you can apply quickly without unnecessary interruptions to keep the polish fresh.
Use High-Quality Polishes
- Invest in Reputable Brands: Purchase nail polishes from well-known and reputable brands. High-quality products are usually formulated with better ingredients, resulting in improved durability and longer shelf life.
- Benefits of Good Polishes: Quality nail polishes often have enhanced application properties, better pigmentation, and improved staying power, making your manicure look stunning and last longer.
Avoid Storing in Cars
- Temperature Extremes: Avoid leaving nail polish in your car, especially during extreme weather. Excessively hot or cold temperatures can cause the polish to harden, separate, or become unusable.
- Consequences of Improper Storage: Polishes left in a vehicle can quickly degrade, leading to a waste of money and resources. Always remove nail polishes from the car and store them in a controlled environment.
By taking preventive steps, you can extend the lifespan of your nail polish. Proper storage and usage are key to maintaining its consistency and effectiveness over time.
Conclusion
In summary, knowing how to thin out nail polish can significantly improve your manicure experience. By using the right techniques and products, you can achieve a smooth application that enhances the look of your nails. Whether you opt for professional nail polish thinner, acetone, or simple water, the key is moderation and experimentation. By following the steps outlined in this article, you can keep your nail polish in tip-top shape, ensuring that you always achieve salon-quality results at home. Embrace these tips and tricks to enjoy perfectly polished nails!