Why Does My Nail Polish Bubble? Common Causes and Solutions
Introduction to Nail Polish Bubbles
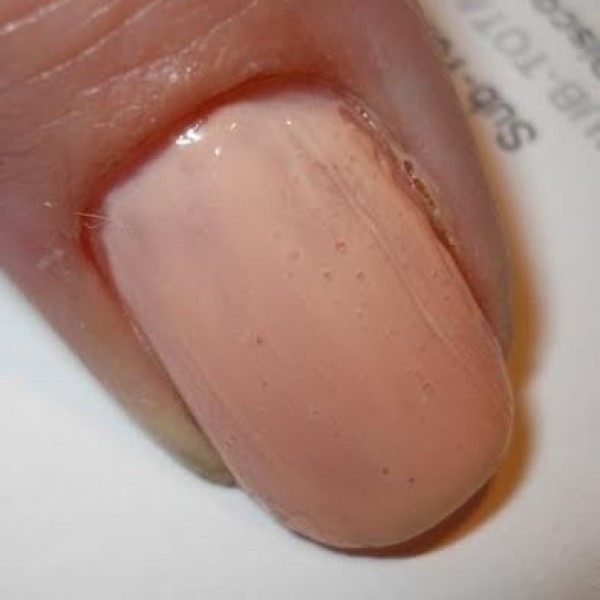
Nail polish bubbles are a common frustration during manicure applications. These tiny air pockets create an uneven and unattractive surface. Understanding the causes and remedies is essential for achieving smooth and flawless nails. Why does my nail polish bubble? Bubbles form when air becomes trapped in the nail polish layers. Factors like poor application, environmental conditions, or old polish contribute significantly. These problems affect both professional manicures and at-home nail painting.
Learning why bubbles appear can help improve application techniques. Simple adjustments can make a huge difference. In this guide, you’ll discover the reasons behind nail polish bubbles and effective solutions to avoid them.
Common Causes of Bubbles in Nail Polish
Understanding the causes of nail polish bubbles can help you achieve smooth, flawless nails. Improper application, product issues, and environmental factors all contribute to this problem. Let’s explore these common causes in detail.
Improper Application Technique
A poor application method can lead to trapped air forming bubbles. If you shake the nail polish bottle vigorously, it introduces air into the polish. Applying polish too quickly or not waiting for layers to dry can also result in bubbles. Rushing through your manicure can worsen the problem.
Using Thick Coats of Nail Polish
Applying thick layers of polish often causes bubbles. Thick coats take longer to dry and trap air within the layers. To avoid bubbling, apply thin, even layers of nail polish. Gradual layering reduces the chance of air being trapped and ensures a smooth finish.
Expired or Old Nail Polish
Old or expired nail polish thickens over time. Thick polish can clump, leading to bubbles during application. Check the expiration date on your nail polish and replace old bottles. Fresh polish ensures better quality and smoother application.
Environmental Factors (Humidity and Temperature)
Humidity and temperature can affect nail polish. High humidity often traps moisture, leading to bubbles. Extreme heat or cold changes the polish consistency, increasing bubble formation. Try to do your manicure in a controlled environment with neutral conditions.
By understanding these factors, you can prevent nail polish bubbles and enhance your nail-care routine.
How to Avoid Nail Polish Bubbles
Why does my nail polish bubble? To achieve a smooth manicure, it’s crucial to prevent nail polish bubbles. By following proper steps, you can ensure a bubble-free finish. Let’s explore effective methods to avoid bubbling.
Preparing Nails Properly Before Application
Start by cleaning your nails thoroughly. Remove any dirt, oil, or old polish. Use a mild nail polish remover and gently wipe each nail. After cleaning, trim and shape your nails as desired. Smooth out rough edges using a nail buffer. This provides a clean and even surface for the polish. Skip lotion or oils before applying polish, as they can interfere with adhesion.
Ensuring Nail Polish is Well-Mixed and Fresh
Old or thick nail polish can easily form bubbles. Check the polish consistency before use. If it’s clumpy, it’s time to replace it. Gently roll the bottle between your palms to mix the polish. Avoid shaking the bottle as it traps air, leading to bubbles. Always store nail polish in a cool, dry place.
Using Thin and Even Coats
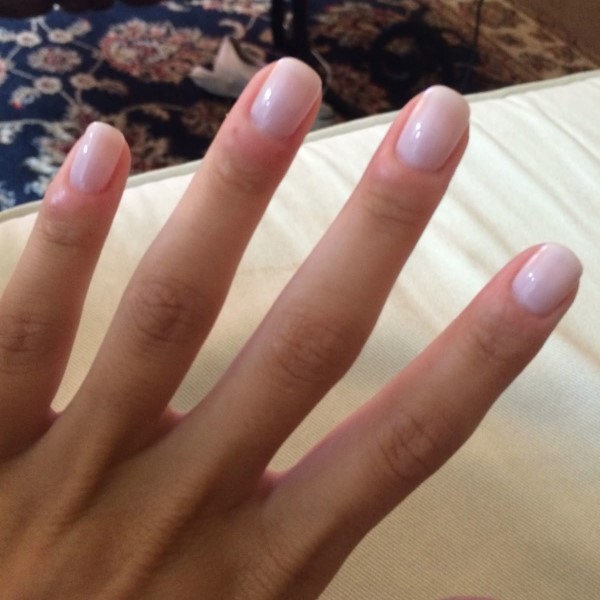
Thick coats of polish are a common cause of bubbles. Apply thin, even layers instead. Start with a small amount of polish on the brush to control application. Smoothly spread the polish from the base to the tip of the nail. Allow the layer to dry before applying the next coat. Building up thin layers ensures a flawless finish.
Allowing Proper Drying Time Between Layers
Patience is key during a manicure. Never rush the drying process. Wait until the first layer is completely dry before adding another. Quick-drying top coats can help speed up the process without risking bubbles. Avoid exposing your nails to heat, fans, or humidity during the drying phase.
By following these steps, you can keep your nails bubble-free and ensure a professional look every time.
Remedies for Fixing Bubbled Nail Polish
Bubbles in nail polish can ruin your manicure. Luckily, there are simple remedies to fix them. These techniques help restore a smooth, polished look without starting over. Let’s explore how to repair bubbled nail polish effectively.
Simple Touch-Up Techniques
Identify and Flatten the Bubbles
- Gather the Right Tools: To start, ensure you have a clean nail tool, such as a cuticle pusher or a wooden stick, handy. Having the right tool prevents contamination and ensures effective bubble management.
- Locate the Bubbles: After applying your nail polish, carefully observe the surface for any raised bubbles. Identifying them early is crucial as it allows for timely intervention.
- Press Down Gently: Use the clean nail tool to gently press down on the raised bubbles. Apply light pressure to avoid disturbing the surrounding polish. This technique helps flatten the bubbles before the polish dries completely, minimizing their appearance.
Smooth with Nail Buffer
- Let the Polish Dry: Once you’ve flattened the bubbles, allow the nail polish to dry until it feels tacky but not fully set. This will ensure the surface is ready for buffing without removing essential layers of polish.
- Choose a Soft Nail Buffer: Select a soft nail buffer, preferably one designed specifically for nails. This type will provide the right texture for smoothing without causing damage.
- Buff the Surface Lightly: Once dry, gently buff the surface of the nail using the nail buffer. Move in a circular motion or back and forth lightly across the nail to minimize any remaining texture caused by the bubbles without overdoing it.
Apply a Small Amount of Fresh Polish
- Select Matching Nail Polish: Choose a small amount of fresh nail polish that matches the color of your existing polish. This will be essential for blending seamlessly with the surrounding area.
- Dab the Fresh Polish: Using the brush, dab a tiny amount of polish over the affected area where the bubbles were flattened. It’s better to start small and gradually apply more if needed.
- Smooth It Out: Gently smooth the fresh polish out with the brush, blending it with the existing polish. Be careful to avoid creating new bubbles during this process.
Use Nail Polish Remover for Major Bubbles
- Assess the Severity: If, after flattening, the surface remains severely bubbled or uneven, it may be best to remove the polish entirely from that specific nail. Make this decision after evaluating the overall appearance.
- Apply Nail Polish Remover: Soak a cotton ball or pad with nail polish remover and gently press it against the nail to dissolve the polish. Allow it to sit for a moment for effective removal.
- Clean the Nail: Wipe the nail clean with the remover until all polish is removed. This prepares the nail for a fresh application.
- Reapply a Fresh, Thin Coat: After cleaning, reapply a fresh, thin coat of nail polish, following the same application techniques as before. This will ensure a smooth finish without bubbles.

Touch Up Edges
- Gather a Fine-Tipped Brush: For this step, use a fine-tipped brush, which could be a nail art brush or a detail brush. This allows for precision when cleaning up the edges.
- Refine the Edges: Dip the fine-tipped brush into nail polish remover, and carefully tidy any uneven edges around the nail. This will give your manicure a polished and professional appearance.
- Apply Overgrown Polish: If there’s any polish that extends off the nail bed, you can also use the brush to clean that up, ensuring that the lines are crisp and clean.
These techniques take only a few extra minutes and help salvage your manicure quickly.
Using a Top Coat to Smooth Surface
Why does my nail polish bubble? A quality top coat can smooth bubbled nail polish effectively. Here’s how to use it:
Choose the Right Top Coat
1. Selecting the Ideal Product
- Quick-Drying Formula: When choosing a top coat, opt for a quick-drying formula. This type of top coat is beneficial because it saves time, allowing you to complete your manicure without having to wait long periods for drying. Quick-drying top coats minimize the risk of smudging and enhance convenience.
- High-Gloss Finish: Select a high-gloss top coat to provide a shiny finish to your nails. A glossy top coat not only enhances the aesthetic appeal of your manicure but also works effectively to conceal minor imperfections in your nail polish.
2. Importance of Quality
- Durability and Protection: A good-quality top coat adds durability to your manicure, offering protection against chipping and wear. Investing in a reputable product ensures that your nails remain vibrant and beautiful for an extended period.
Apply Over Dry Polish
1. Ensure Complete Drying
- Timing the Application: Before applying the top coat, ensure that your nail polish is entirely dry. This crucial step prevents mixing the top coat with the underlayer of polish, which could ruin the finish and lead to uneven results.
- Conducting a Dry Test: To verify that your polish is dry, gently touch the surface of one nail with your fingertip. If it feels tacky or leaves a mark, wait a little longer before proceeding with the top coat application.
Layer Evenly
1. Application Technique
- Using the Brush Properly: When applying the top coat, use the brush to spread a thin, even layer. This ensures that the product lays uniformly over the nail, providing a smooth finish.
- Starting Point: Begin applying at the base of the nail, where it meets the cuticle, and glide the brush towards the tip of the nail. Maintain consistent pressure to avoid thick spots and uneven distribution.
2. Importance of Thin Layers
- Preventing Bubbles and Drips: Applying a thin layer reduces the risk of bubbles forming in the top coat. Thick layers are more prone to running and may take longer to dry, which could jeopardize the quality of your manicure.
Seal the Edges
1. Securing the Manicure
- Horizontal Swiping Technique: After applying the top coat, swipe the brush horizontally across the nail tip. This technique helps to seal the outer layer of the top coat, ensuring longer-lasting wear.
- Protection Against Chipping: Sealing the edges minimizes the chances of chipping, as it protects the polish from lifting at the tips, which is a common issue with DIY manicures.
Let It Dry
1. Allowing Sufficient Drying Time
- Complete Drying: Allow the top coat to dry completely before resuming any activities with your hands. Giving it enough time to set is essential for ensuring the longevity of your manicure.
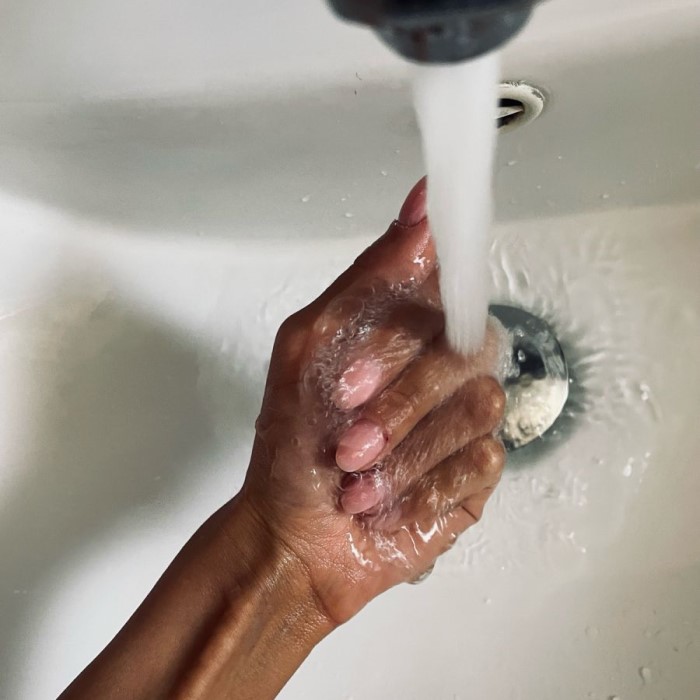
- Avoiding Moisture and Touching: During the drying process, avoid touching surfaces or exposing your nails to moisture. Activities like washing hands or submerging them in water can affect the top coat’s performance and lead to smudges or chips.
2. Final Tips
- Patience Is Key: While waiting for your top coat to dry may require patience, it significantly contributes to the overall quality of your manicure. A well-dried coat provides a beautiful and durable finish that you can enjoy for days.
By following these steps and paying attention to each part of the application process, you can achieve a beautiful, long-lasting manicure that showcases your style and skill.
Using a top coat enhances durability and gives your nails a shiny, smooth finish. Incorporating these remedies helps you rescue a flawed manicure and achieve flawless nails.
Professional Tips and Tricks for Perfect Application
Achieving a flawless manicure requires more than just following basic steps. For a polished and professional look, consider these expert tips and tricks. These strategies not only prevent nail polish bubbles but also enhance the overall finish.
Select High-Quality Nail Polish
Using high-quality nail polish is key to a smooth manicure. Premium brands often have better consistency and fewer bubble issues. Cheap polishes may contain poor ingredients that increase bubbling. Invest in reliable products that offer smooth application and long-lasting results.
Use the Right Tools
Having the proper tools ensures a professional finish. Use a high-quality nail brush for even application. Clean brushes prevent clumps and bubbles. A UV or LED lamp can help cure certain polishes, avoiding uneven drying. Make sure your tools are clean and in good condition.
Apply a Base Coat
A base coat creates a smooth surface for the polish. It helps the color adhere better. Use a thin, even layer of base coat before adding color. Base coats also prevent staining and improve the durability of your manicure.
Avoid Overloading the Brush
When applying nail polish, avoid too much polish on the brush. Excess polish can lead to thick layers, causing bubbles. Instead, dip the brush lightly and remove excess polish on the bottle’s rim. This technique ensures thin, even coats.
Minimize Environmental Impact
Control your manicure environment to reduce the risk of bubbles. Keep the room temperature neutral and avoid high humidity. Use a fan or dehumidifier if needed. Avoid direct sunlight or AC drafts while your polish dries.
Use a Protective Top Coat
A good top coat locks in polish and adds a glossy finish. Apply a thin, even layer over dry nail polish. Avoid rushing through this step, as the top coat prevents bubbles and seals the layers beneath.
Practice Patience
Take your time during application. Rushing leads to uneven layers and bubbling. Allow each layer to dry completely before adding another. Practicing patience results in a flawless, bubble-free manicure.
By following these professional tips, you can take your manicure to the next level. Each step works together to create a polished, long-lasting finish. Master these techniques for salon-quality nails every time.
Conclusion: Achieving Bubble-Free Nail Polish
Understanding why does my nail polish bubble can greatly enhance your nail-care routine. By recognizing the common causes of bubbling and implementing effective solutions, you can enjoy a flawless manicure every time. Remember that technique, environment, and product quality play significant roles in achieving bubble-free results.
Whether you are preparing for a special event or just want to feel great about your nails, taking the time to properly prepare and apply nail polish can make all the difference. So, use this guide to refine your skills and ensure a stunning, professional-looking finish for every manicure!